
How to install LED Strips?

Here For Help!
- Customized Design
- Logo Printing
- Special Accessories
- Free Samples
- Other Questions

If you plan to make colors or subtlety to a room, LED strips are a great choice. You can easily set up them even if you don’t have any electrical experience. A successful installation just takes a little bit of planning at first to ensure you get the right length of LEDs, satisfied dimmer and a power supply to match. Then, you can connect the LEDs with purchased connectors or by soldering them together.
Myledy is the expert in LED strip lights, we take a one-step-further approach with everything we do and are committed to providing the best lights you’ve ever purchased.
Here let’s follow the easy instruction to install your LED strips.
01
Project overview
Before we install our LED strips, to make a project overview is very necessary.
Make sure you have a clear vision of your project and know how you want the end result to look like. And then plan where you want to install your adapter and dimmer switch. Sure it’s best to install your LED strip lights on a clean, flat surface using the 3M adhesive tape or mounting clips.
Aluminum LED profile is preferred, as it will help dissipate the heat from the LEDs to ensure a longer lifespan and make the light more beautiful.
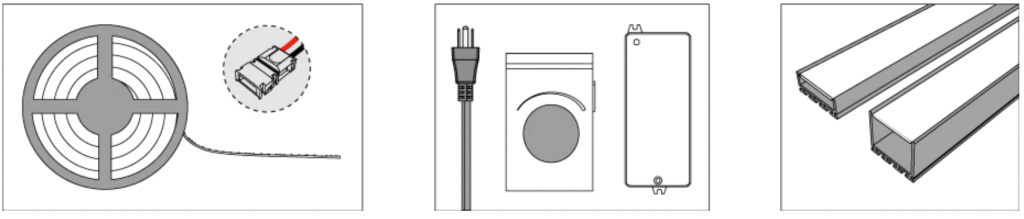
1.1 Selecting LEDs and Power Supplies,LED profiles, dimmer switches and connectors.
1.2 Check installation location and prepare for installation of LED tapes:
- Measuring length of mounting LED strip required, record it;
- Confirm the position of dimmer switch and power supply;
- If other situation need to considered? For instance, drilling holes
1.3 Check components:
- Make sure you have all the tools you need to complete the installation.
- Make sure your power supply is the right voltage to match your LED strips and it can handle the entire load of the LED runs.
- For longer runs of LED strips, pay attention to the strip’s maximum run length. If you need a run of lights longer than the stated maximum, you may need to install them in parallel from the power source.
02
LED Strip and Aluminum extrusion processing
After overview of whole projects and now let’s begin to deal with the LED tapes to satisfy our requirement.
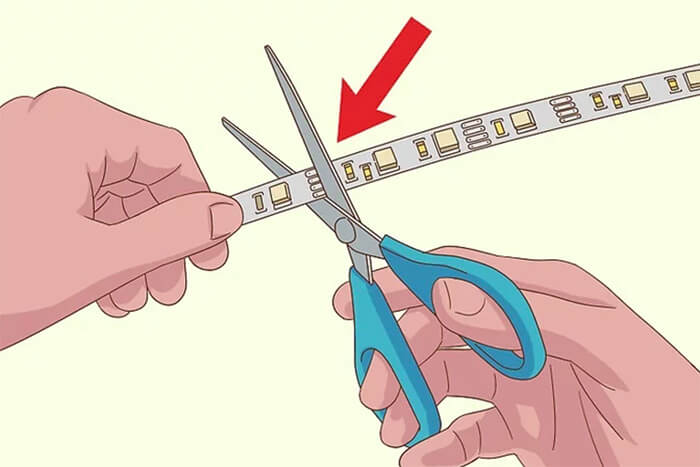
2.1 Adjust the lengths of LED strip and aluminum extrusions.
- If no aluminum profile — Cut the LED strip to optimum length according to your measured length (notice that led strip light has minimum cut length, you should cut at indicated welded parts with sharp scissors.)
- If aluminum profile required — Cut the Channel and LED strip to optimum length accordingly.
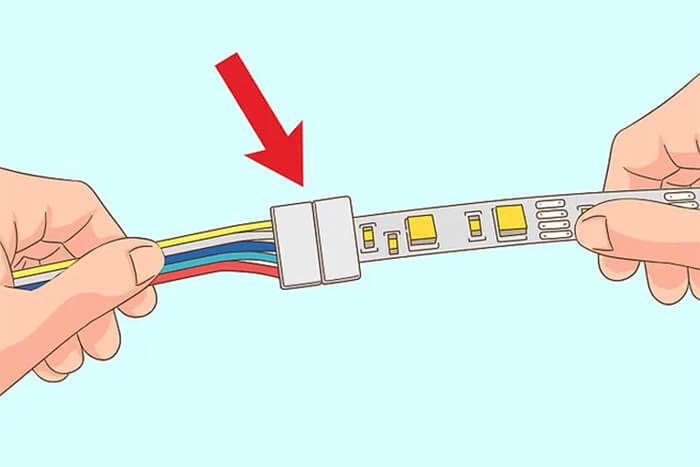
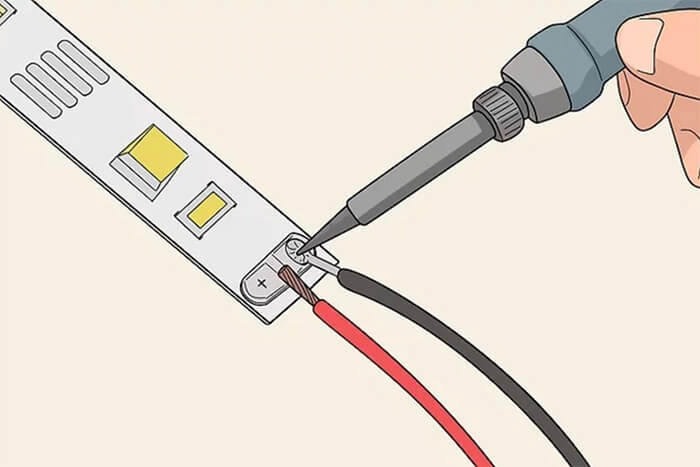
2.2 Connect the LED tape and cable
There are two methods for connecting:
- soldering the cable on the welded parts of LED tape:
- connect them with a connector.
Connectors are easier to use, it could be better for easy project; but soldering is a prefer option for a more permanent way to join LED strips and connectors.
- Furthermore, you can make factories customize special lengths of light bands. As professional manufacturer, Myledy can make OEM orders for you.
03
Mock installation
3.1 Mock connection
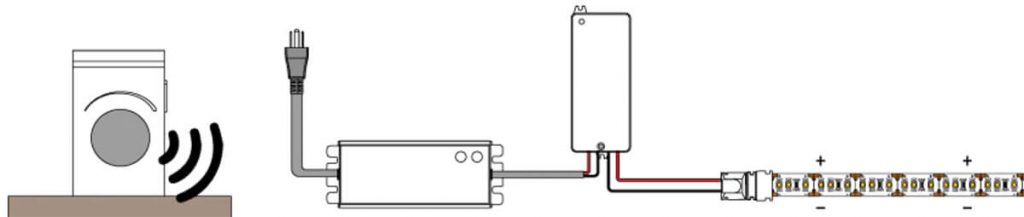
Before peeling the tape or cutting the strip, make sure to complete a mock installation to test and turn on your lights. Connect your LED tapes to your dimmer and power supply, light up.
3.2 Troubleshoot if needed
After connection, the strips should light up. If they do not, please check your connections and make sure the polarity is matched from the power supply to the LED strip (positive to positive, negative to negative). There are markings on the strip to indicate polarity.
3.3 Check the light
Reassess the results against your vision Hold the strips in place in a sample area that can best demonstrate your application. Verify that the chosen brightness and color temperature is perfect for your project.
A mock installation can help you identify any failures and save time. After checking the mock installation, you can move on to the next step.
04
Install your LED tape and other components
Thoroughly clean any surface where you will be attaching your LED strip lights. The adhesive backing is strong, but will not stick to surfaces if they are dirty or dusty.
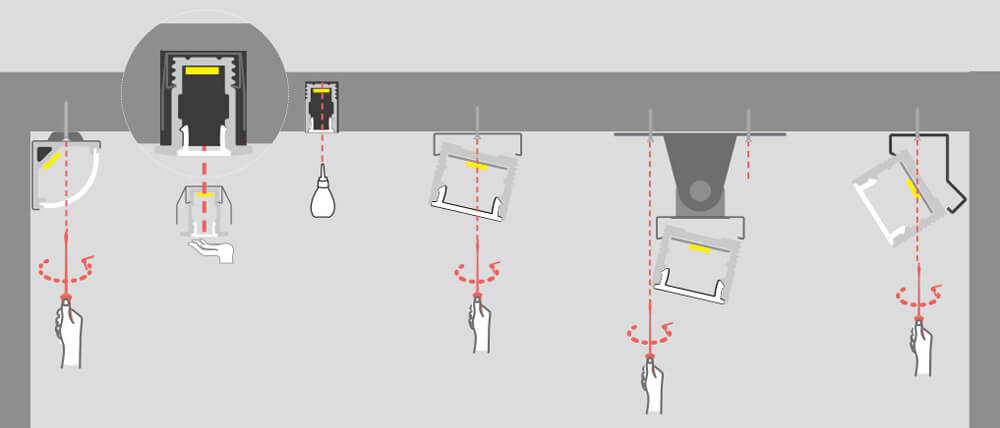
4.1 Install the LED profiles.
LED profiles can play the role of heat dissipation and soft lighting, different aluminum channels are mounted in different ways. If your LED tape light is equipped with aluminum profile, install them first and then paste the LED tape in.
4.2 Install the adjusted LED strips.
- Strip light pre-install preparation
Thoroughly clean any surface where you will be attaching your LED strip lights. The adhesive backing is strong, but will not stick to surfaces if they are dirty or dusty.
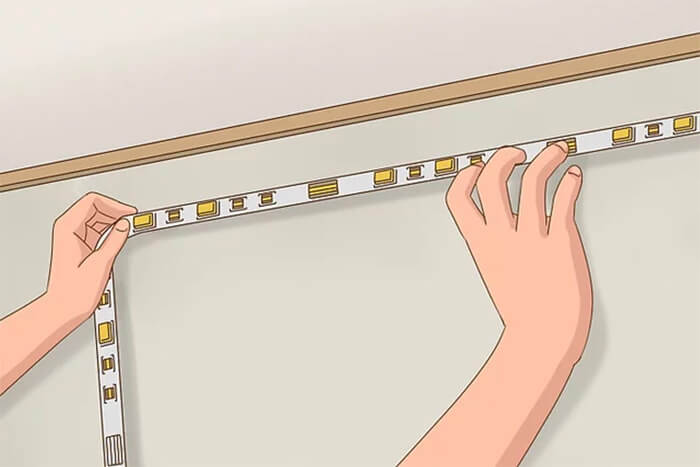
- Paste the strip light in place
Peel the cover of the 3M tape a few inches at a time while gently pressing the strip to the installation surface. Make sure the strip is secured on the surface.
4.3 Complete all connections
Complete the connections and wiring between your power supply, dimmers, controllers, or connectors. Enjoy your light solution.

remark:Make sure polarity is matched throughout the setup When installing separate segments of the LED strip together by soldering or using connectors, always make sure the polarity is matched from one strip to the next.
05
Warnings
- Attempting to wire LEDs into your home’s circuitry is dangerous, Installation must be in accordance with local and national electrical code regulations. To ensure safety and correct installation, you’d better to call an electrician to have it done professionally.
- In addition to burn risks, soldering involves fumes from melted metal that can be harmful. It’s better to take proper safety cautions by wearing protective gear and ventilating the room when you solder LED strip.
- Do not turn on your LED strip when it is still in the plastic reel. This will cause a buildup of heat that can damage the LEDs.
- Do not directly hook the DC strip up to an AC wall outlet.
- Do not twist, fold or crease the LED tape, and bend LED strips horizontally (sideways) is also will damage them. LED strip is only intended to bend vertically.
- Pay attention to the input voltage of the LED strip light and never exceed that voltage, even briefly.
